Cybersecurity focus on Linux
This project was part of the Cybersecurity certification. The process involved verifying permissions on the /etc/shadow file and creating user accounts incorporating 16-character passwords (not a user favourite is it?) with numbers and symbols expiring every 90 days. Also appended the Admin user to ensure as the only user with general Sudo access. Then created a user group with access to a shared folder for collaboration. Finally ran the Lynis report to audit the system and define actionable items for system hardening.
Permissions on /etc/shadow should allow only root read and write access.
    1. - Command to inspect permissions: 'ls -l /etc/shadow' displays read/write access, for owner only

  - Command to set permissions (if needed): 'sudo chmod 600 /etc/shadow' will change permissions to -rw- --- ---
- Permissions on
/etc/gshadowshould allow onlyrootread and write access.- Command to inspect permissions: ‘ls -l /etc/gshadow’ displays read/write access, for owner only
- Command to set permissions (if needed): ‘sudo chmod 700 /etc/gshadow’ will change permissions to -rwx — —
- Permissions on
/etc/groupshould allowrootread and write access, and allow everyone else read access only.- Command to inspect permissions:’ls -l /etc/group’ displays read/write access to root, and everyone else can read only:
as displayed here: -rw- — r– - Command to set permissions (if needed): ‘sudo chmod 644 /etc/group’ will change the permissions, if required to -rw- r– r–
- Command to inspect permissions:’ls -l /etc/group’ displays read/write access to root, and everyone else can read only:
- Permissions on
/etc/passwdshould allowrootread and write access, and allow everyone else read access only.- Command to inspect permissions: ‘ls -l /etc/passwd’ displays read/write capability for owner (root) -rw- — r–
- Command to set permissions (if needed): ‘sudo chmod 644’ to change permissions, if required to -rw- r– r–
Step 2: Create User Accounts
- Add user accounts for
sam,joe,amy,sara, andadmin.- Command to add each user account (include all five users): sudo adduser sam | sudo adduser joe | sudo adduser amy | sudo adduser sara | sudo adduser admin
- Force users to create 16-character passwords incorporating numbers and symbols. (Note this has system wide effect)
- Command to edit
pwquality.conffile: ‘sudo nano /etc/security/pwquality.conf’ - Updates to configuration file: remove the # from minlen and change value to = 16
remove the # from dcredit and change value to = 0
remove the # from ucredit and change value to = 0
remove the # from lcredit and change value to = 0
remove the # from ocredit and change value to = 0
remove the # from minclass and change value to = 1
- Command to edit
- Force passwords to expire every 90 days.
- Command to set each new user’s password to expire in 90 days (include all five users): ‘sudo chage _M 90 user’ lets expire their password effective today in order to force a change (-E 17/10/2020)
let’s also set up the users so they get 5 days warning (-W 5) moving forward sudo chage -E 17/10/2020 -M 90 -W 5 admin
sudo chage -E 17/10/2020 -M 90 -W 5 sam
sudo chage -E 17/10/2020 -M 90 -W 5 joe
sudo chage -E 17/10/2020 -M 90 -W 5 amy
sudo chage -E 17/10/2020 -M 90 -W 5 sara
- Command to set each new user’s password to expire in 90 days (include all five users): ‘sudo chage _M 90 user’ lets expire their password effective today in order to force a change (-E 17/10/2020)
- Ensure that only the
adminhas general sudo access.- Command to add
adminto thesudogroup: after creating user ‘admin’ ran ‘sudo usermod -aG sudo admin’ to append admin to sudo user
then to ensure admin has sudo access: run ‘groups admin’ (displays ‘admin : admin sudo’ which verifies ‘admin’ added to sudo group.)
I then added a user under admin using ‘sudo adduser’ to prove admin’s sudo capability. It worked.
- Command to add
Step 3: Create User Group and Collaborative Folder
- Add an
engineersgroup to the system.- Command to add group: ‘sudo addgroup engineers’ (to verify group was added run ‘cat /etc/group | grep engineers’ Output ‘engineers:x:1018’
- Add users
sam,joe,amy, andsarato the managed group.- Command to add users to
engineersgroup (include all four users): ‘sudo usermod -aG engineers amy’ ; ‘sudo usermod -aG engineers joe’ ;
‘sudo usermod -aG engineers sam’ ;’sudo usermod -aG engineers sara’.
run ‘cat /etc/group | grep engineers’ to view engineers group and determine amy, joe, sam and sara are indeed associated with the engineers group.
- Command to add users to
- Create a shared folder for this group at
/home/engineers.- Command to create the shared folder: as root: ‘mkdir /home/engineers’
- Change ownership on the new engineers’ shared folder to the
engineersgroup.- Command to change ownership of engineer’s shared folder to engineer group: run ‘sudo chown 1018 engineers’
then ran ls -l to view directories – and engineers shows 1018 with root
- Command to change ownership of engineer’s shared folder to engineer group: run ‘sudo chown 1018 engineers’
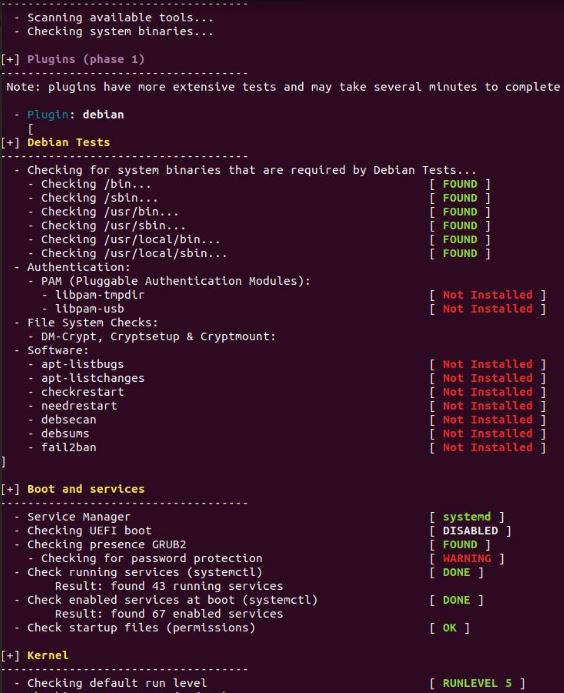
Step 4: Lynis Auditing
- Command to install Lynis: ‘sudo apt-get install lynis’
- Command to see documentation and instructions: ‘sudo man lynis’ to display man pages
‘sudo lynis show help’ to display commands and options - Command to run an audit: run cmd ‘sudo lynis audit system’
- Provide a report from the Lynis output on what can be done to harden the system.
- Screenshot of report output: .jpg 1 & 2 in folder

Bonus
- Command to install chkrootkit: ‘sudo apt install chkrootkit -y’
- Command to see documentation and instructions: chkrootkit -h
This changed! Check documentation on how to run a scan to find system root kits. - Command to run expert mode: expert mode is option -x
sudo chkrootkit -x - Provide a report from the chrootkit output on what can be done to harden the system.
- Screenshot of end of sample output: .jpg included in file